Hi , Sometimes it's fun to try new things. Especially with your Fujifilm camera. After all Fuji and Fun begin with the same letter, and there are so many fun creative options to be had
with your X Series system, there are almost endless opportunities to keep yourself busy when you're out shooting. Cyclocross is my happy place. I love shooting cyclocross and I love racing cyclocross. This past weekend marked two milestones. First, I think I shot more photos on this past Saturday than I ever have at any single race: 3 heats with 5,389 total
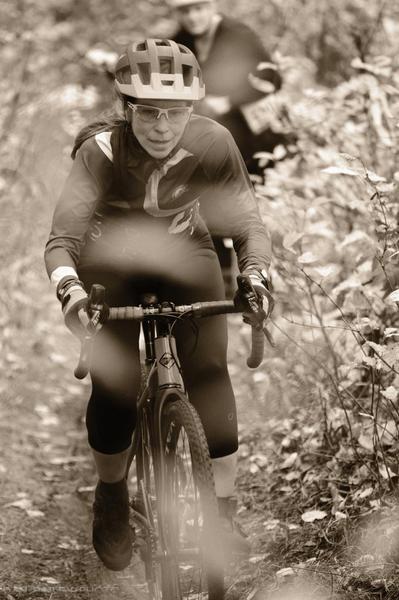
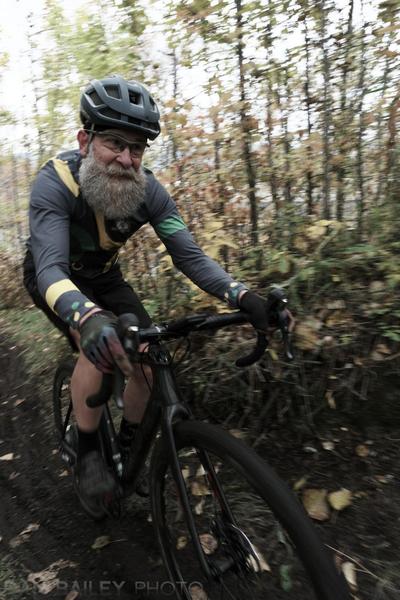
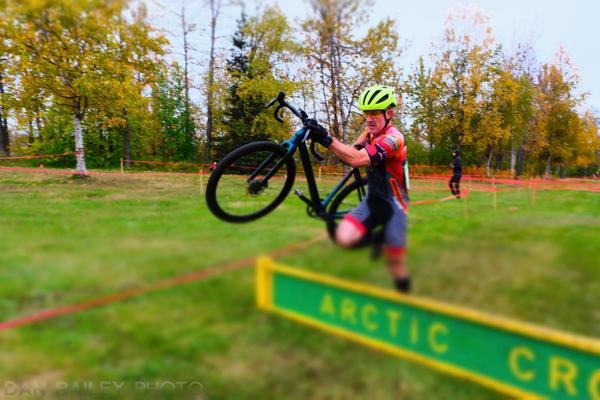
frames burned through my X-T5. Also, this weekend marked my triumphant return to racing. After sitting out for 5 months, I braved mud, wet grass, slippery sidehills and a moose, being as careful as I could to NOT fall, completed the hour-long race, and I didn't even get last place in my division! So yea... I'm back, baby! It will still take me a few months to achieve 100% recovery in terms of full strength and flexibility, but for the most part, I'm returning to regular life again. However this email is not about me, it's about inspiring you to try different things with YOUR Fujifilm camera. In the past few weeks, I've been talking about autofocus. Today. I'm going to focus on different creative approaches and some of the looks you can get right inside the camera. Here are a few of my favorite shots from this past Saturday. For each photo, I'll quickly run down my general approach. Hopefully this will spark some ideas in you for your next photo shoot. I LOVE shooting back and white with my X Series cameras, usually using the built-in ACROS Film Simulation. ACROS has such a great, dynamic look that holds up extremely well at higher ISO settings. To my eyes, shooting ACROS at ISO 3200 is pure magic. Another favorite technique is to us the Monochromatic Color setting inside the IQ Menu, (called BW WARM/COOL Adj. on the X-T3), to give my black and white images a warm or cool tone. You can also shift the image towards magenta or cyan tones as well, but I generally prefer moving the adjustment straight up or down to give me a sepia-toned look, or a cool, slightly blueish tone. Another technique I often like to use is shooting through things, in order to give added depth to the photo. Here, I'm positioning myself in the woods and shooting through bits of foliage with long lens (In this case, the XF50-140mm f/2.8.) Tweaking the Film Simulations I LOVE the creative versatility of the Fuij film simulations, but you can give yourself even more options by adjusting things like Shadow Tone, Color and Clarity, which you can find inside the Q Menu. Bumping up the Shadow Tone adds contrast to your photos, which can give them a harder edge. In the shot above, I've added +2 Shadow Tone to the new Nostalgic Neg film sim, which has good Fuji-style colors, but not a ton of contrast. That extra shadow tone gives the shot more grit and rich dynamics. Another fun option is to use the Clartiy setting, which adds edge contrast, much like the Clarity slider in Lightroom. This adds additional sharpness and definition to your shot. I love combining Shadow Tone with Clarity, but keep in mind, you can only use Single shot mode when using Clarity. This is because it requires additional processing after the image is captured. You can't shoot in continuous mode with this setting. This might be a hinderance with some subjects, but it also might be a fun challenge to add to your scenes After all, if you can nail the right moment with a single frame, then you might have gotten lucky. Do it again and and again, and you're a zen master with the camera. Using the Advanced Filter Effects The X Series cameras have a set of Advanced Filters, which are found inside the. ADV. FILTER SETTING inside the SHOOTING SETTING - DRIVE SETTING menu. (On most cameras, the DRIVE setting needs to be set to Adv. for these to work.) This is where you'll find creative filter effects like Toy Camera, Miniature Mode, Pop Color, Dynamic Tone, Soft Focus, Partial Color and more. Two of my favorites are Toy Camera and Miniature. The the first two shots above are using the Toy Camera effect, while the second two below are using Miniature Mode. As with Clarity, you can only do single shots with these settings, which can make it really hard to shoot
action using in this mode. However, I'm never one to shy away from a challenge, and if you time it right, you can capture some great moments and give them a unique creative look. I hope that these examples inspire you to try new creative approaches when you're out shooting this season. If you get something that you're especially proud of, then feel free to tag
me on Instagram or Threads @danbaileyphoto. And while we're on the subject of action photography, if you want to be better at shooting things that move quickly, no matter if you shoot sports, kids, dogs, birds, etc...then you'll want to check out my comprehensive course, Mastering the FUJIFILM Autofocus System. This essential course has helped hundreds of Fuji shooters up their game and become more proficient with their cameras. It teaches you all about how to manage your tools, skills, subjects and expectations. With a series of focused video lessons, I can help you improve your skills with the camera. Use discount code
FALLFOCUS to save 15% on the course right now. It's fully guaranteed. If you're not satisfied with the course for any reason, I'll give you a full refund. You have everything to gain and nothing to lose, except a rabbit hole of time spent practicing, taking
pictures, and hopefully getting some awesome images. Thanks so much for reading this email, and to everyone who has followed my shoulder journey during the past 5 months, I really appreciate your support. Take care and happy shooting!
|
Sincerely,
Dan Bailey
dan@danbaileyphoto.com
|
|
|
|