Here's your copy of the Dan Bailey Photo Newsletter - Feb 2017 Issue
Published: Wed, 02/01/17
Hi ,
Whoa, January flew by!!! I can’t believe it's February already! January was a very good month for us here in Alaska, I have to say. We started with lots of really cold weather, and then got some big snow dumps. Last week, I spent the better part of Tuesday afternoon shoveling 2.5 feet of snow off my roof. Now it’s all in my yard. I guess spring’s going to come late this year. All in all, it's been a good winter for playing outside.
Maybe you do this too- I typically track each month by the adventures I had and the photos I shot. In other words, my goal with each one is to have a few really fun “play days” or long adventures if I’m away from home, and get at least a few really cool shots that I love. Hopefully you’ve been able to get out and enjoy some time outside this January and shoot some stunning photos.


I’d like to thank everyone who send me feedback though my website last month. To those of you who answered, I really enjoyed getting to know you a little better and hearing what you like and would like to see more of on my blog and newsletter. Some of you said you’d like to see more articles on processing, so we’ll start there.
I typically don’t do a ton of processing on my images. I really love the image files that come straight out of my Fuji cameras, but occasionally, I’ll bring them into Lightroom or Luminar to rescue things like highlights and shadows, or tweak the in a creative way to add some additional style. Here are a few image examples to show you my process and mindset.
Processing Photos with Lightroom/Photoshop
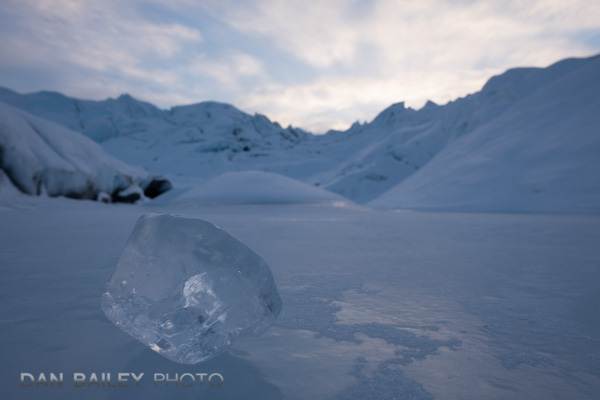
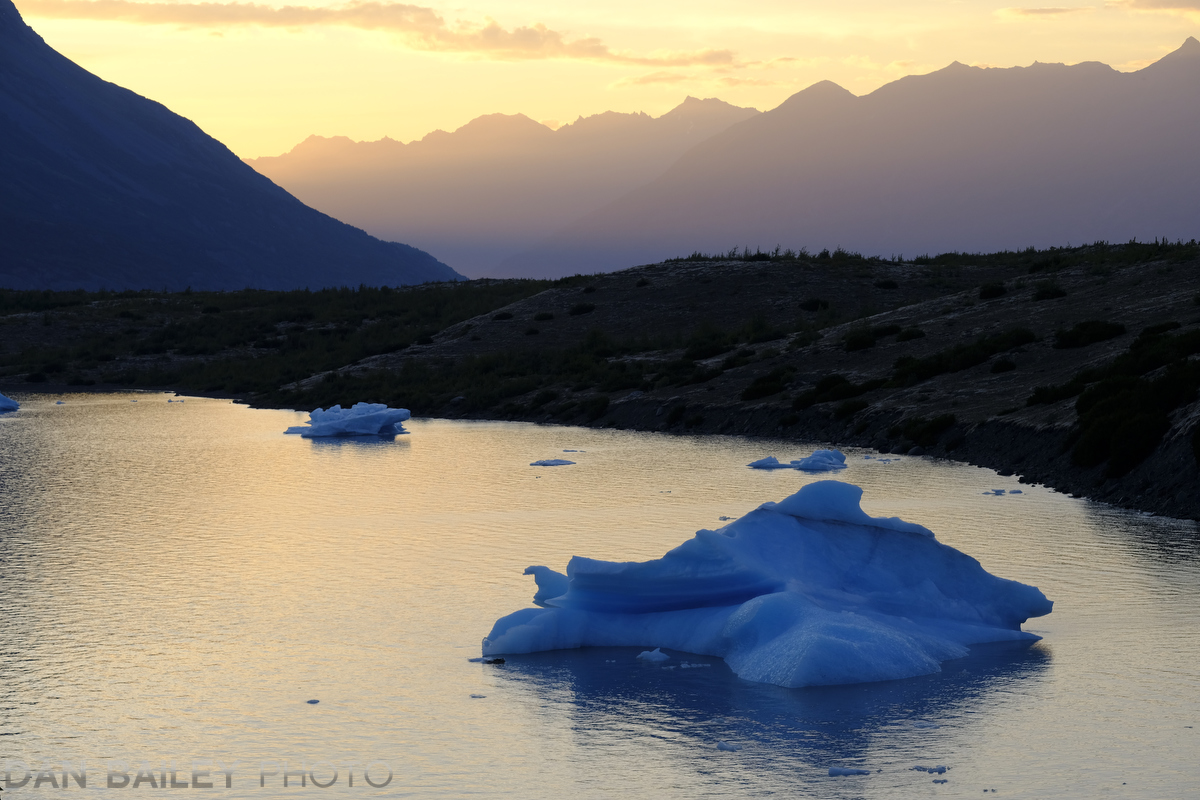
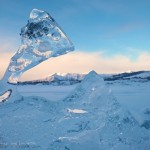
Here’s a photo I shot last year out on the Matanuska Glacier. The first image is a straight RAW file from my X-T1. As with any RAW file, it’s a little flat. In other words, it’s a blank canvas that’s waiting for some paint. Or, in this case, some slider action.
My primary goals with this image are to preserve the color in the sky, bump up the overall color in the scene to make it more rich, and to make that ice cube stand out with as prominence as possible.
Using the Basic Panel in Lightroom, I brought the Highlights down (-61), and bumped up the Exposure a bit (+.75). To rescue the sky even more, I used the Gradient tool (fourth tool in the very top, after Crop, Spot Removal and Red Eye Reduction) and drew a mask about halfway down the frame. Then I reduced the Exposure a little bit in the Gradient mask to darken the sky.
In this way, I’m simply using the Gradient tool to act as a split neutral density filter. Check out this short tutorial video to see exactly how this is done.
To bring out the color and ice cube, I increased the Clarity (+36) and bumped up both Vibrance and Saturation (+14). Here’s the finished version.
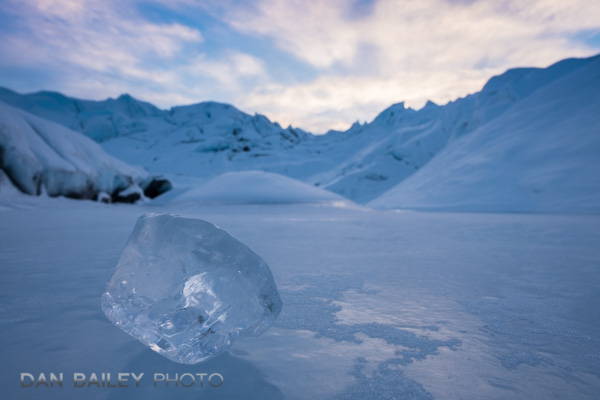
Could I do more to this shot? Probably? The limit is usually based on how much time do I have and what am I trying to achieve. Remember, the end result should be based on this simple question: “Do you like it?” It’s easy to get caught up in whether you did it right, but again, it’s all about what you’re trying to achieve or accentuate in the shot.
Processing Photos with Luminar
I’ve really been excited about Luminar lately. In fact, I’ve used Luminar far more often than LR or PS during the past two months to process my photos. I like that I can totally customize the user workspace and add whatever tools I need. This way, it doesn’t get cluttered up with a ton of tool palettes that overwhelm.
Also, I love the presets. I’m not usually a preset guy, but the ones in Luminar are really fun and they offer a wide array of options to expand your creativity, whether you’re trying to tweak just a little bit to make you shot pop, or if you want to take it off in a totally new direction and give it a unique look.
Here are a three examples.
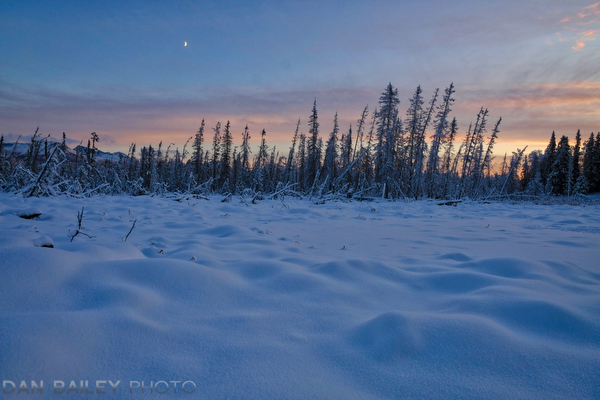
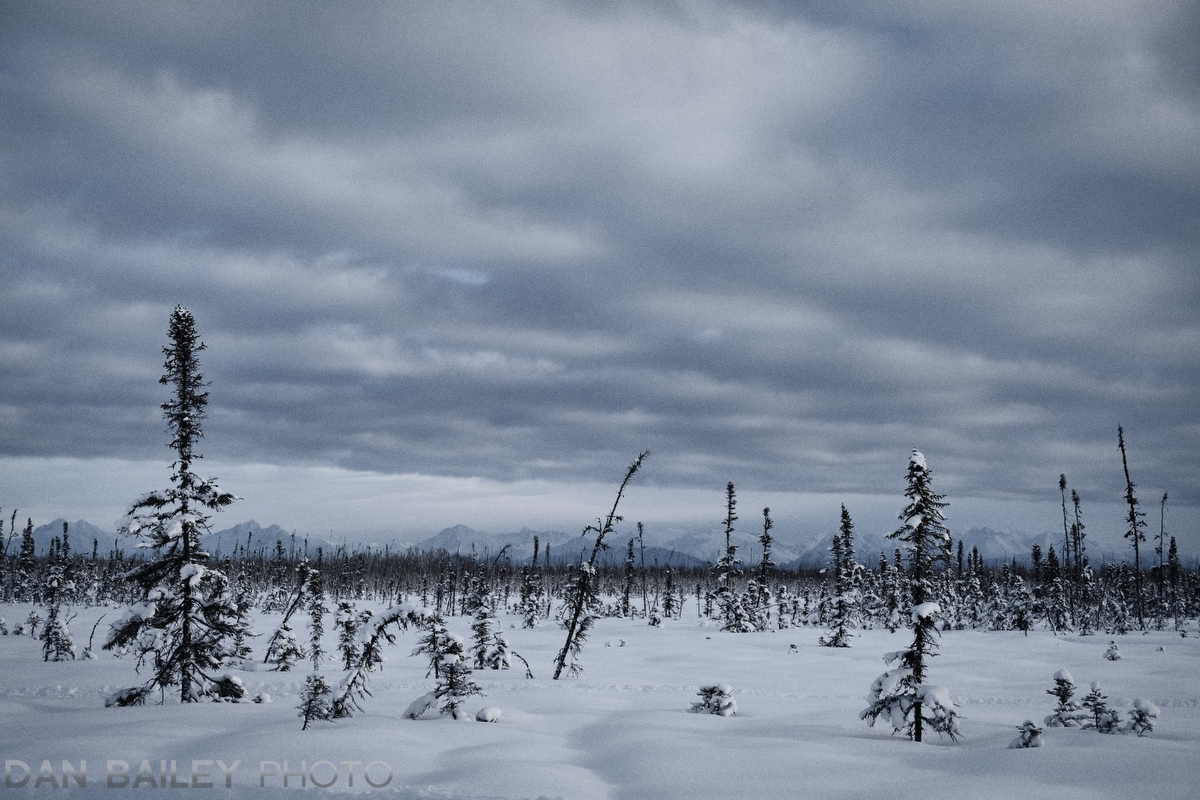
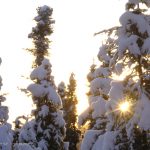
Winter Landscape
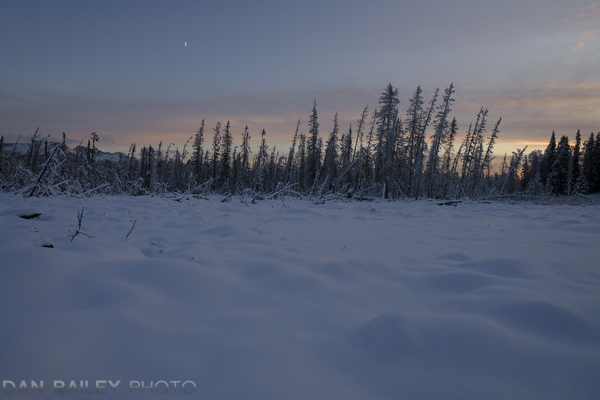
In this shot, I just wanted to add a little vibrance and clarity to make the shot pop. Here, it was a simple matter of choosing the “Image Enhancer” Preset and than dialed it down to about 20 or 30%. That’s the really nice thing about the presets, and it’s what makes Luminar so easy and fast. You choose a look, and then you can dial it anywhere from 0-100%. Then you can add in whatever slider tool you want, and if you have a similar style of processing you can save your tool setup as a custom workspace.
So, for this one, after I applied and dialed in the preset, I used the Exposure tools to bump the Exposure and Vibrance levels up just a little bit. That’s all. From start to finish, it probably took about two minutes.
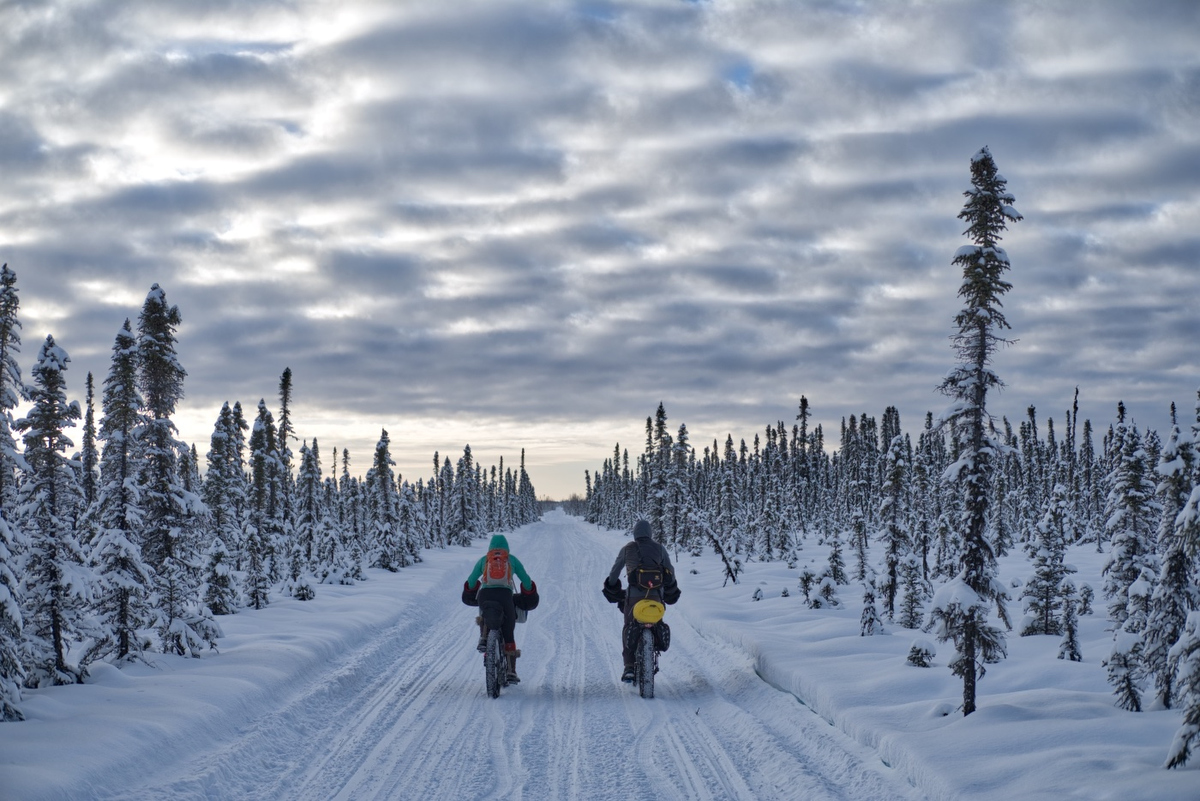
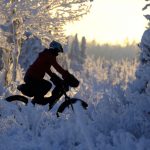
Snow Biking
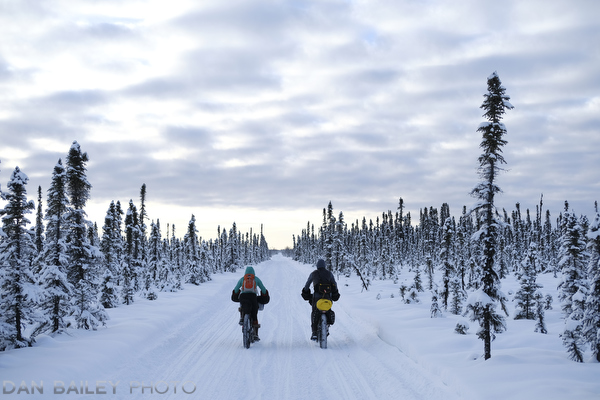
In this example, I used the “Detailed” preset and dialed it down to 67%. Then I brought the Highlights down and increased the Shadows to open up the mid tones. It’s a very dramatic shift, and it only took a minute or two. I wouldn’t normally crank an image up so much, but for this shot, I wanted to really bring out the drama of the scene.
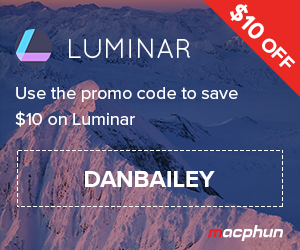
Winter Landscape
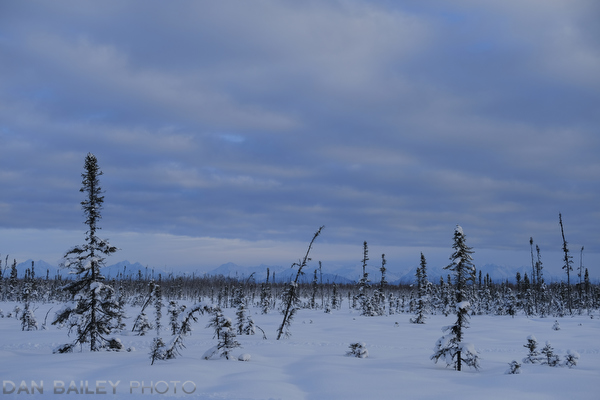
For this image which is a straight JPGE, I wanted to get even more creative and go for a totally different look. Honestly, I wasn’t sure what I was going to do here, I just started picking presets and seeing what they looked like.
I settled on the preset called “Film Noir” and dialed it down to about 50%. This preset gives a very dramatic look, and it varies quite a bit at each of the different percentage settings. At the higher levels, it added even more film grain and produced a very monochromatic look. Dialed down, it brought some color back, but keep the grain and a certain level of “grayness.” All the way down it reduces contrast and brings back the color.
Again, this adjustment took all of about 30 seconds from start to finish after the image file loaded into Luminar.
If you haven’t checked out Luminar, you can download the demo here, and as one of my readers, you can use this special link and the coupon code DANBAILEY to save $10 on the program. Windows users, fret not, apparently MacPhun is planning on bringing out a PC version of the program later this year. Even if you use Lightroom, Luminar is definitely worth a look.
Special Subscriber eBook Deal - Save 40% on Making The Image - 3 Days Only.

I like to give you guys special discounts that show my appreciation for your being subscribers. After all, that’s one of the perks of being one of my newsletter readers.
So, here’s a special deal for you. For a limited time - 3 Days Only - Save 40% off my eBook, Making The Image: A Conceptual Guide For Creating Stronger Photographs.
Making The Image is a 50 page eBook that will guide you towards making more powerful photographs. By exploring how the human visual system responds to the world, it breaks down imagery into individual concepts, such as light, color, balance and viewpoint and shows you not only how, but why you should apply those concepts to your own photos in order to make them stronger.
It also explores both the definition and the methodology of creativity as they apply to different types of images and image making, which can help you take a more active role in your photography.
Creative photography isn’t just about randomly taking pictures and hoping they come out, it’s about perceiving and anticipating the right moment and going through a process of evaluating the scene and the light, and working through the solutions needed to render it with as much visual power as possible.
I consider this book to be the defining guide on my own photographic style, as it accurately represents how I see and compose my imagery.
This special 40% discount is only available for 3 Days, and then it jumps back to full price.
Don't wait- Get Your Copy of Making The Image at the special price.
Upcoming Workshops
I’ve got a few workshop on the calendar for 2017. Here are the dates so far. I hope you can join me for one or more of them! Also, I do custom workshops as well, so if you find yourself in Alaska this year and want to go photograph brown bears with me or just have a half or full day private tutorial, please contact me so we can schedule your dates.
2017 FUJIFILM X PHOTOGRAPHER SUMMITS
Study and learn “on location” from a group of official FUJIFILM X-Photographers in these intensive, three and a half day workshops, set in the varied landscapes of the Great Smoky Mountains and the Pacific Northwest. (Instructors: Jack Graham, Bill Fortney, Dan Bailey, Karen Hutton & Dan Westergren.)
• April 5-9, Great Smoky Mountains, TN
• September 6-10, Portland, OR
2017 MIDNIGHT SUN ALASKA GLACIER PHOTOGRAPHY WORKSHOP – JUNE 23-25
Camp on the shore of a glacier lake in Alaska, paddle around the icebergs and photograph landscapes under the midnight sun and shoot aerial photos of massive glaciers from an open-door helicopter. There are still a few open spots on this one, but they usually fill up quickly!
AERIAL GLACIER HELICOPTER PHOTO TOURS – Custom

Shoot stunning aerial photos of a massive Alaska glacier. Includes a glacier landing where you get to walk around and explore the amazing landscape of ice and rock up close. Year-Round. Contact me for info.
Gear Corner
Canon Camera Deals
There are some big savings on Canon Cameras and Lenses right now, especially when you choose a camera and lens bundle. See all the deals here.
Nikon Camera Deals
Nikon also has a wide selection of camera bundle deals. If you’re looking to upgrade to a new Nikon DSLR, check out the current deals.
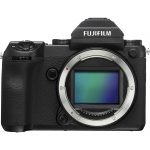
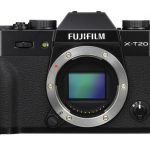
New Fujifilm Gear
Fuji has just announced their new upgraded X100F, X-T20, which both have the new 24MP sensor and X Processor Pro image processing chip- which means great ISO performance, speed boost and ACROS film simulation. They also announced the new XF 50mm f/2 WR lens. This is a great addition to the lineup, and it will make an awesome compact portrait lens!
You can preorder these items now. Given that the X-T2 is still on backorder in some stores, it’s probably a good idea to get your orders in soon!
Sigma has some good deals going right now.
Sigma has lenses for Nikon and Canon DSLR mounts, and they even have some lenses with M4/3 and Sony mounts as well.
One of my best recommendations, though, is the Tokina 100 f/2.8 Macro for Nikon and Canon. It’s a superb quality lens and it costs a fraction of what the comparable brand name versions cost. I’ve owned Tokina lenses before, and I can attest to their quality. You can’t go wrong here.


Around The Web
10 Things Every Creative Person Must Learn - Excellent advice by top shooter Chase Jarvis. These are essential bits of knowledge that we should all have in the forefront of our creative brains.
Creativtiy Overload - It Can Make or Break Your Ideas - Some good methods for dealing with those times when you simply have too many creative ideas all fighting for the same space in your head. Great piece by Tiffany Mueller.

Verrant James Photography - One of you, a fellow reader and subscriber. Kevin Verrant James is a photographer based in Hampshire, UK. He shoots beautiful coastal landscapes around the southwest corner of Britain. Great work. Check it out!

Don't Get Discouraged, Everyone Takes Bad Photos - No matter how good a photographer you are, the truth is that you'll end up with more bad photos than good ones. Here's how to work around that often frustrating mindset.
Coffee and Nature - Another great post by Robert Rodriguez, Jr. Apparently, Robert takes his coffee seriously, both as a drink and a ritual. Read his take on the process of maintaining your mind and body for peak creative performance.

Well, that wraps up another issue. I hope you launch into February with much enthusiasm and lots of creative motivation. Enjoy the blog posts below and please share this newsletter with your own friends and followers.
As always, thanks for reading and keep in touch.
Best,
Dan


|
||||||||||||||||||||||||||||||||


   |
Unsubscribe to this newsletter |