The Dan Bailey Photo Newsletter, July 1 Issue
Published: Tue, 07/01/14

| Exploring the World of Outdoor Photography with Tips, News, Imagery and Insight | Dan Bailey's Adventure Photography Blog | ||||||||||||||||||||
|
Hi , It’s now July, which means that 2014 is now half over, or if you want to look at it the other way, we still have an entire half year in front of us! Although summer is always a busy time for shooting, playing outside and taking trips, I like to take a little bit of time when July hits to reflect on the past six months. I like to think about what I’ve accomplished, how well I’ve managed to stay on top of my workflow, and consider ways to improve my productivity and creativity.
Are there images you’ve wanted to shoot or places you’ve wanted to visit this year that you haven’t gotten to yet? Are you falling behind on your workflow? Are there ways you could improve that with changes to your methods, gear or software? Even learning a few new keyboard shortcuts can make a big difference in the long run. Today’s operating systems and software programs are full of shortcuts that most of us never unlock. Take time to learn one or two each week or month and you’ll see your overall efficiency rise. I posted a link to the list of Lightroom shortcuts in the last issue, but here it is again.
 Photo Editing TipsI don’t know if it’s the same for you, but photo editing is the one place where I get behind most often. As of last month, I had over 10,000 photos sitting in my “unsorted” folder in Lightroom. I’ve managed to get that number down below the 6,000 mark, but that’s still a huge amount of photos. Not only does that slow me down, it slows the computer down. 6,000 multiplied by however many MB my RAW files take up, (it’s about 32MB for the X-T1) equals 192 GB of data that slows down everything: the LR catalog, my HD, and my time.
It’s important to stay on top of your editing, but it’s easy to let it go. I sometimes import a card, look for the good ones, share them online, post them to my blog or website and move onto something else. There they sit until I import another batch of new photos. And if they don’t get keyworded, it makes it that much more labor intensive to find a specific photo when I need it.
Stay on top of your keywording. Make use of the little “Spray Can” tool in Lightroom, this can quickly help you keyword and tag large numbers of image very quickly. Also, make keyword sets for yourself, this lets you assign entire groups of keywords to like images. Anything you can do to increase your efficiency will help you stay on top of your workflow, especially since you’re probably be shooting tons of new images on trips and vacations this summer.
Photo Editing Software This week, Apple announced that it was pulling the plug on Aperture. They’re rolling everything photo related into a brand new app called Photos for OS X, which will be included in the new 10.8 “Yosemite” update that’s coming later this year. Although Apple says that Photos will include many of the same features that Aperture had, at this point, there’s no way to tell if the Photos app will be adequate for full-on pro photography use. My guess is that the entire thing will be made “consumer-friendly,” which means that it won’t be optimized for pros anymore.
So, if you’re an Aperture user, you might start thinking about where to migrate. In my mind, you have two choices, either Adobe Lightroom or Capture One. Lightroom offers an excellent photo management system and strong processing tools. It comes in a standalone version, or it can be used as part of the Adobe Creative Cloud package, which comes bundled with Photoshop CC for only $9.99/month.
Not everyone is excited about the idea of paying Adobe ten bucks a month for the rest of their lives, so that’s where the standalone version of LR might be a good way to go. For most users, it offers everything you need to get the job done. Since migrating to LR, I use Photoshop less than I used to.
Capture One Pro Capture One Pro 7 by Phase One is a viable alternative to the Adobe package that has a full library catalog and library management system. Phase One recently bought Media Pro, which was a great digital asset management software solution that was designed by iView. That’s what I used for all my cataloging when I first went digital. Eventually, it was bought by Microsoft, who later sold it to Phase One, who obviously used it to increase the cataloging power of Capture One.
Where Capture One Pro excels, though is in the image quality department. It features an exceptionally good RAW converter that delivers absolutely stunning detail and color. With a host of adjustment tools and a fully customizable workspace, Capture One is very powerful and complete digital imaging solution.
I know this because I recently demoed the program. I was so impressed with Capture One Pro 7 that I bought it less than a week into my 60-day free trial period. (It’s half price right now, through July 5.) Originally, I didn’t want to get into another system, since I’m already entrenched in Lightroom, but I was blown away by how well it does processing RAW files. Colors pop more. They have more clarity and definition. My Nikon files are a little bit sharper and show less noise, but it’s the Fuji file that make it like night and day.
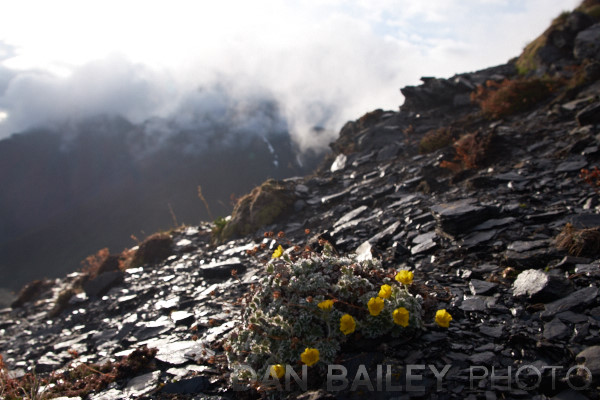 Most cameras use a Bayer pattern of even RGB pixel distribution on their front of their sensors. Since the even arrangement can cause moire with certain subject matter, an optical low pass filter is often used to combat this effect at the expense of a slight loss in sharpness. The Fuji X-Trans sensor uses an irregular array of RGB pixel distribution, which eliminates the need for an optical low pass filter and thus makes for higher resolving power and sharper images.
Adobe software is highly geared around the Bayer style sensor, and even though they support the Fuij X-Trans sensor, Lightroom and Photoshop still don’t do a very good job rendering the Fuji RAW files. When you zoom in, they’re slightly blurry and busy details like leaves, foliage and rocks on distant mountains get “smudged.” Capture One Pro uses a different processing engine that does a MUCH better job rendering the Fuji RAW files. Right off the bat, they’re WAY sharper and even the most intricate details are preserved.
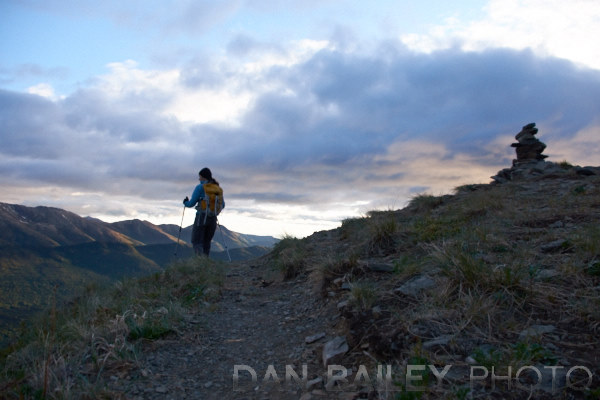 I’m not ready to abandon Adobe yet. I’ll still use Lightroom for catalog and photo management, at least for now, but as I move forward, I’ll be using Capture One Pro to do my image editing and processing. Here’s how:
Pay attention, because this is important. If you simply set Capture One as your second external editor in Lightroom, it will still use LR to do the basic RAW demosaicing, which is the process by which software constructs an image from the RAW sensor data. This totally defeats the purpose of using C1, so in order to send the unprocessed RAW file, you need to install a plugin called Open Directly into Lightroom. This lets you send the RAW file directly from the LR catalog to another editor like C1. (Once you install Open Directly, you access it from the Plug-in Extras in the Library Menu.
There’s also a lite version called Capture One Express. You get the same RAW processing engine as the pro version, but you don’t get local adjustments, dual monitor support or Sessions, which is a great solution for people who shoot things like portraits and weddings. In fact, based on its great adjustment tools and overall functionality, I’d highly recommend checking out Capture One Pro 7, especially if you shoot Fuji. If you just want better RAW processing and can live without the expanded features, Capture One Express is a pretty good solution, and right now it’s only $49- again, through July 5.)
 Iridient DeveloperIridient Developer is a RAW conversion software written for Mac. Although it lacks the high end GUI and expand functionality of programs like Lightroom and Capture one, it does an excellent job rendering the Fuij X RAW files. They’re brilliantly sharp and the colors look great. It’s not quite as intuitive, but once you get a handle on how it works, you can get excellent results. The software coney costs $75, so it might be a good solution for someone who just wants an external RAW editor to use outside of Lightroom. Here’s a post on how to incorporate it into the workflow. This method also works with Capture One.
The New Nikon D810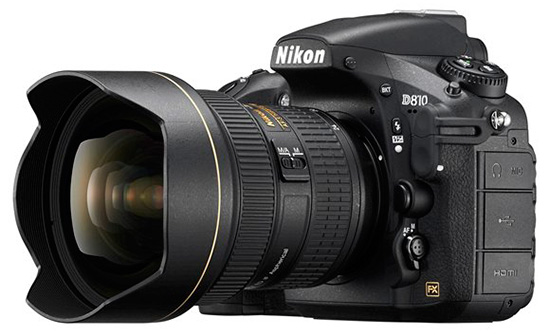 This week, Nikon announced the brand new D810. It’s the update to the D800. Although it’s not a major update, what they did change make the D810 a more capable camera for outdoor photography. It has a newly designed 36.3 MP FX format full frame sensor, and like the D800E, it has no optical low pass filter, which means it gives maximum resolution. They also incorporated the new EXPEED4 image processor, which should improve image quality even more.
In addition, Nikon increased the frame rate. Full resolution is now 5 fps, 6fps in 5:4 crop mode, 6 fps in 1:2 crop mode and 7 fps in DX crop mode. Other advancements include a 91,000-pixel 3D Matrix Meter III and increased video capture capabilities.
The D800 was already an incredible landscape camera, and now it’s even more capable for shooting outdoor activities, sports, wildlife and adventure. To this point, there is no DSLR camera that has a higher resolution. I just may have to consider this one.
My Alaska Photography Workshops Through the Lens Alaska is now photo workshops under our new name Alaska Photo Treks. The two main workshops that I'm offering right now are my Sunset Photo Safaris and my Brown Bear Photo Treks. Both are ideal if you find yourself in Anchorage and have a day to spare. The Sunset Photo Safari is a 4-hour evening workshop where we go chase light until midnight, while the Brown Bear Photo Trek is a one-day bear watching photo workshop tour to a remote area in Lake Clark National Park. If you plan to come to Alaska this summer, definitely keep these in mind.
 Around the WebLandscape photographer extraordinaire Guy Tal frequently writes about creativity, wilderness, nature and other contemplative issues that we as outdoor photographers face. Read his post On Significance, which touches on the concepts of “meaningful” and “significant” as they apply to artists.
I always like David Hobby’s post and instructional tips. His latest venture is a travel photography video series that’s shot in different locations. It’s like a travel photography book that’s a video instead. Knowing David, I’m sure it will be pretty cool. Read more about it here in his post On Traveling with your Camera.
Summer is prime time for landscape photography. Here are 6 Essential Lessons in Landscape Photography, written by Jason Row for Light Stalking.
Michael Frye is an excellent landscape photographer based in California. Check out his post Chasing the Light and Weather, where he talks about shooting in fog and about forecasting weather, which is in integral part of planning for any landscape photo shoot.
Today begins a new month, which means I began by calibrating my displays. It’s a good practice to do this on a regular basis. Read my post called Monitor Calibration Systems for Outdoor Photographers. It talks about the complexities of outdoor light, why you should calibrate and includes recommendations on affordable display calibration equipment. (I use the Datacolor Spyder system.)
Enjoy the posts below, and don’t forget to share this newsletter with your own fans and friends. I hope you enjoy your week and shoot some awesome photographs!
Dan

| |||||||||||||||||||||
   |
Unsubscribe to this newsletter |
 Follow @Danbaileyphoto Last night I kicked off the 2014 summer photo workshop season and led my first Sunset Photo Safari here in Anchorage with Through The Lens Alaska. There were four of us on our evening adventure, my co-instructor Jody Overstreet, and …
  Follow @Danbaileyphoto There were times when I couldn’t see more than 50 feet in front of me. It was like walking a trail to nowhere that kept refreshing itself every few paces. Since I’d never been up this trail before, …
  Follow @Danbaileyphoto If there’s one thing I love about summer, it’s hiking above treeline. Nothing brings me quite the same joy as going on long mountain rambles, piecing together alpine ridge traverses and frolicking in the high tundra. Give me …
  Follow @Danbaileyphoto Last week Adobe rolled out a big new update to their Creative Cloud service and announced a few new features and improvements for photographers. The first is the fact that after dangling the carrot in front of us …
  Follow @Danbaileyphoto Despite the constant improvements and updates to Photoshop CC and the fact that Adobe just made their $9.99/mo LR + PS Photography Program permanent, the whole Creative Cloud plan still leaves a bad tastes in some people’s mouths, …